Land Minting Guide
This guide shows how to mint DeNations Lands.
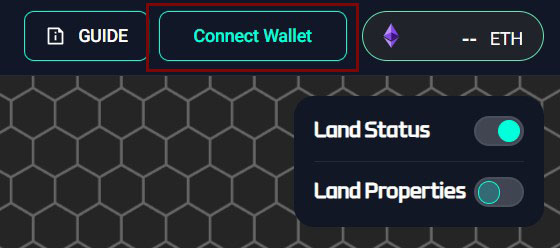
Step 1. Connect Wallet on Land Map.
Step 2. Change your network to Polygon.
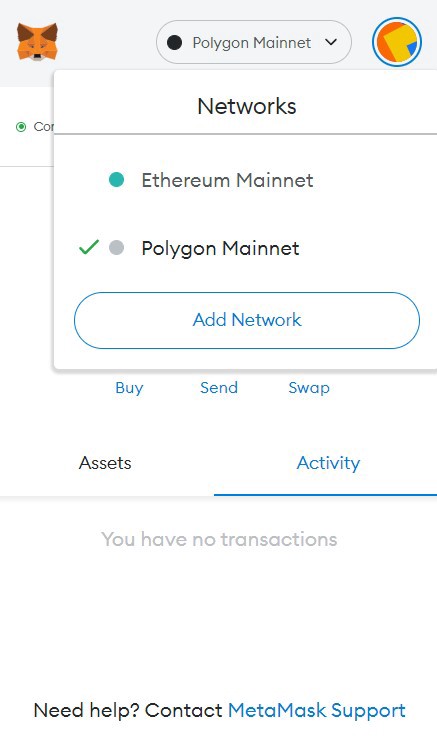
** If you did not change your network to Polygon, please approve the request when the website tries to register or switch to the Polygon network.
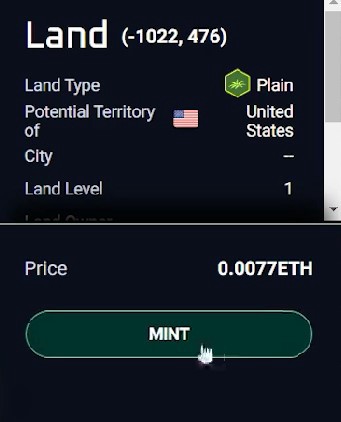
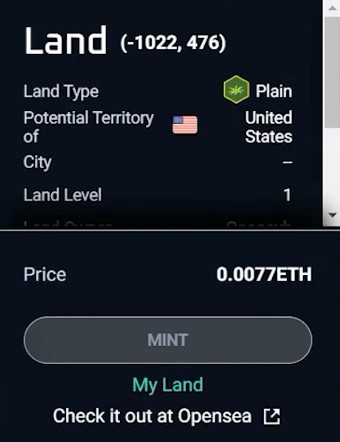
Step 3. Select the land you would like to mint.
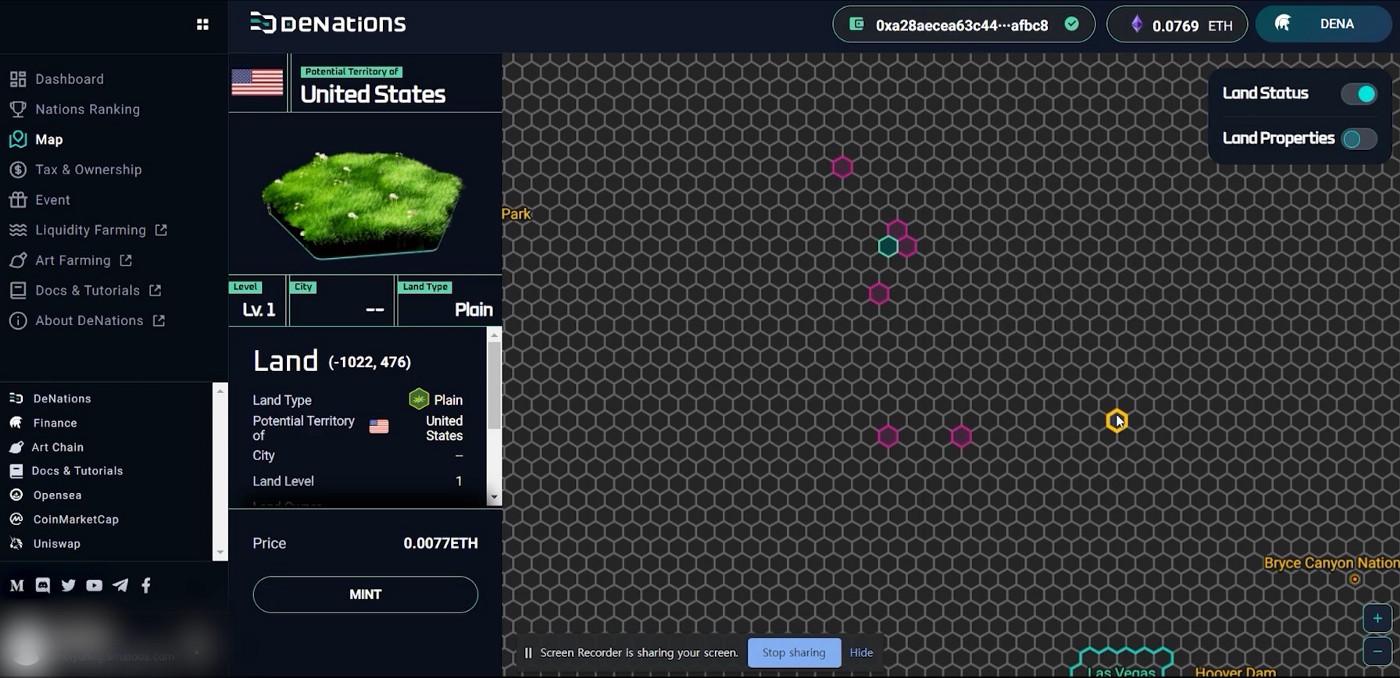
Step 4. Click ‘Mint’.
Step 5. ****Accept Wrapped Ether (WETH) Transaction.
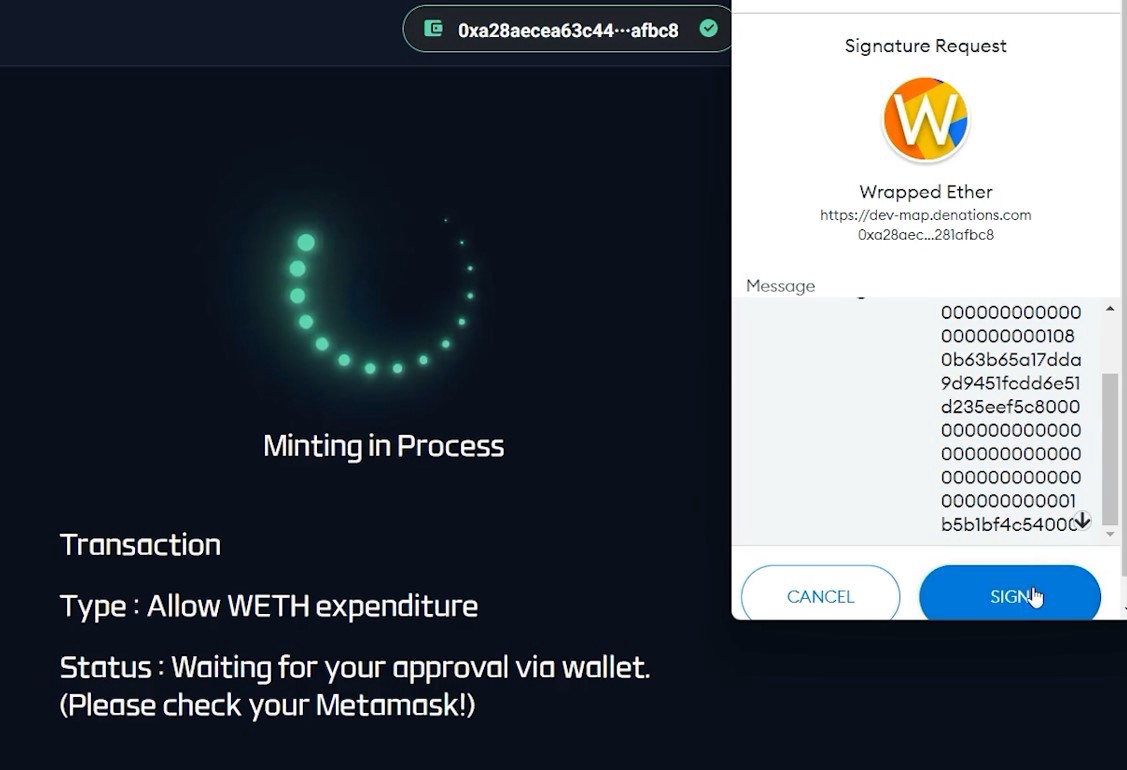
** We pay the transaction fees for you.
When you mint, there will be a request for a Wrapped Ether(WETH) Transaction before the Land Mint Transaction. Please accept the request and allow WETH expenditure so that we can make the transaction for you.
Step 6. Accept Land minting transaction.
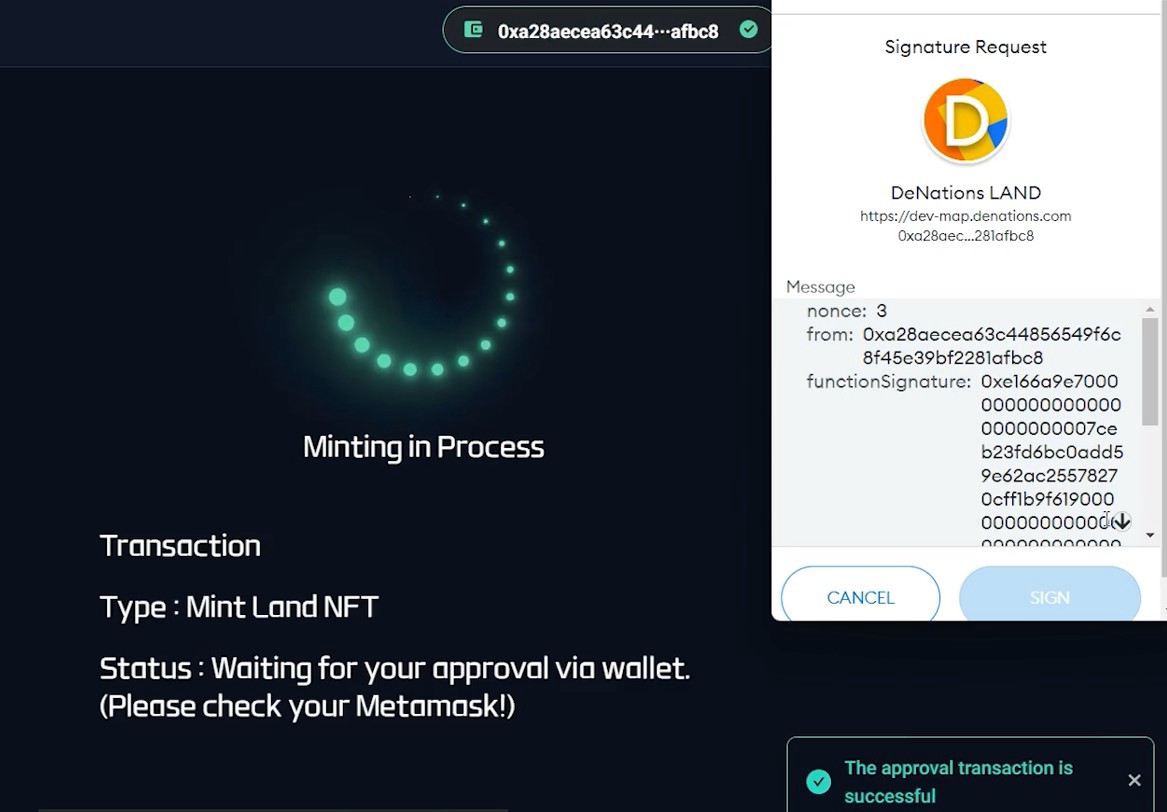
Step 7. Land Minting is in process.
-b5bf3aa571621bb95ce785cffd558194.jpeg)
**DO NOT refresh the page when minting is in process.
Step 8. The land will appear as ‘My Land’ after minting.
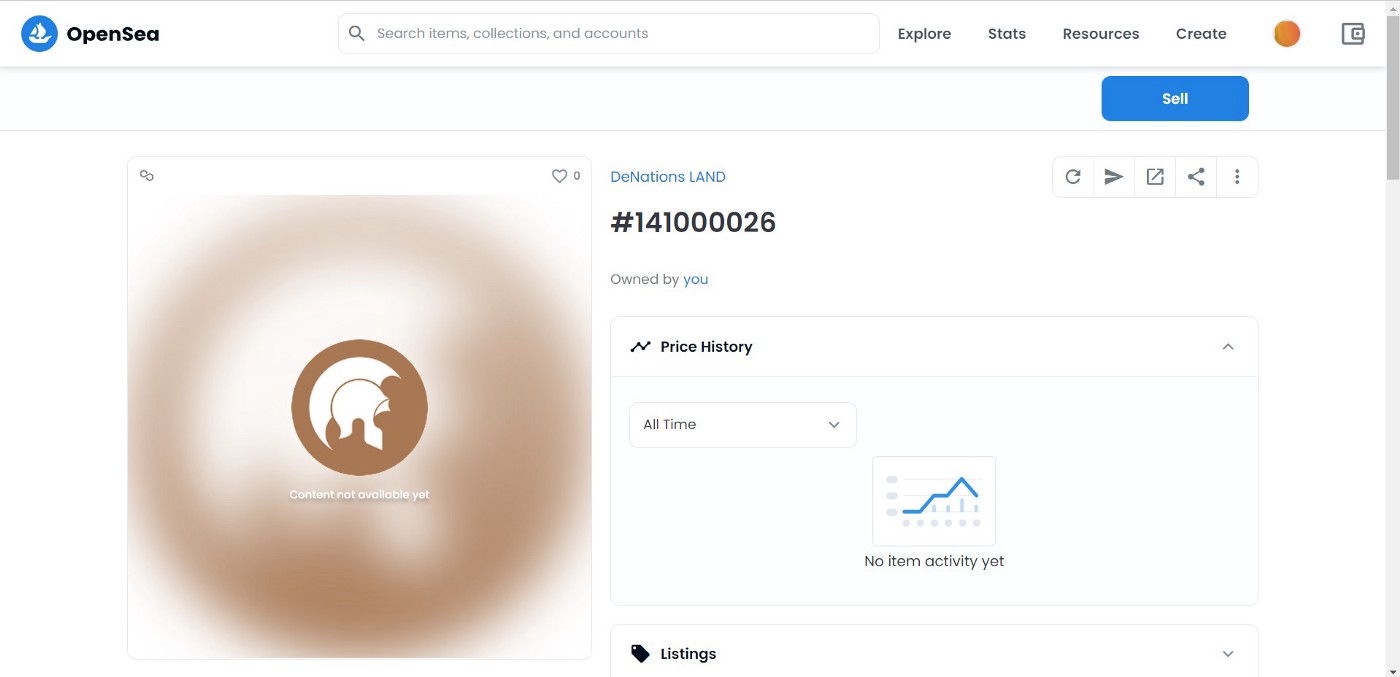
Step 9. Check your land on Opensea
Note: Your land may appear on Opensea like the screen below. This is NOT a minting error. The Opensea website needs some time to process, so please wait and check back later.
IMPORTANT#
✔️MetaMask account must match with the registered account on DeNations.
✔️Make sure you have enough funds before the minting starts.
✔️If you come across ‘invalid address’ or ‘ENS name’ errors, it is highly likely that it is a MetaMask issue. When this happens, try deleting the Polygon Mainnet network and re-add it after. If this does not work, please try re-installing MetaMask.